Simple Home Calculator
Motivation
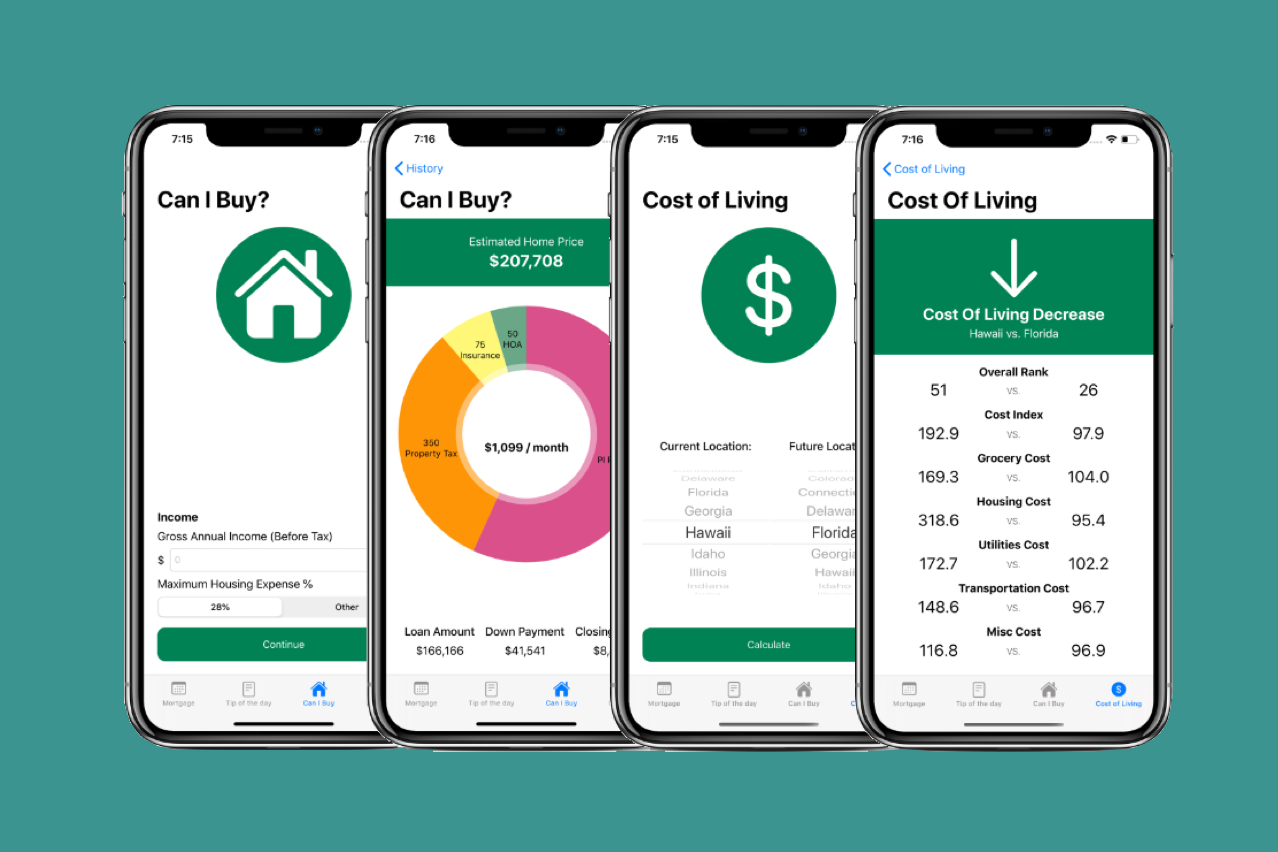
As my first building exercise at Lambda School, I teamed up with a classmate of mine to tackle building a full iOS app in five days. Our job was to simply create a mortgage calculator. Instead, we decided to make an app full of features that could facilitate many different aspects of the home buying experience. We divided the app into four tabs, each of us building out two of those tabs. My partner took on the mortgage calculator and home buying tips, while I built a home affordability calculator and cost of living calculator. Together, we created Simple Home Calculator.
The main requirement for our build week project was to use basic persistence and the MVC (Model View Controller) design pattern. We took it a step further by incorporating the use of a CocoaPod (Charts) and loading objects from local JSON. I also wanted our app to have a consistent UI across all four tabs, so I incorporated the use of SF Symbols and a green tint across our app.
My Role
I researched preexisting home affordability calculators online in order to get an accurate representation of what I would build. I was able to find an Excel spreadsheet that gave me the formulas I used to build my calculator. The hard part was converting some of Excel’s built-in functions into Swift functions. I was also tasked with setting up our project with a CocoaPod for displaying charts. I chose Charts, which we both used to display results from our calculators. Lastly, I added basic persistence for each calculation so the user could view the results again later or compare calculations with different values.
For the cost of living calculator, I was able to find a relevant JSON file from 2019 containing the cost of living information for each state in the US including its cost rank, housing cost, utility cost, etc. I loaded in the local JSON using Codable and determined a cost increase or decrease based on the user’s current location and future location’s cost rank.